Introduction |
Last summer, my sister packed a picnic for the community garden and slipped the deviled eggs into a battered bag. The moment those golden yolks met fresh tuna, I discovered a flavor I almost gave up on for seasons of bland spiced eggs.
She’d shown me how the tuna replaced mayo, giving the dish a clean salt‑to‑fat balance. I almost gave up on this recipe until her coworkers raved about the bite‑size, protein‑packed bites at the park.
- ●Bold mouthfeel that satisfies without choking.
- ●Quick prep, less than 15 minutes from start to finish.
- ●Protein boost from tuna and eggs for a hearty bite.
- ●Bright, tangy flavor with fresh herbs and a splash of citrus.
- ●Crowd‑pleasing appetizer for parties, BBQs, and casual gatherings.
Essential Ingredients |
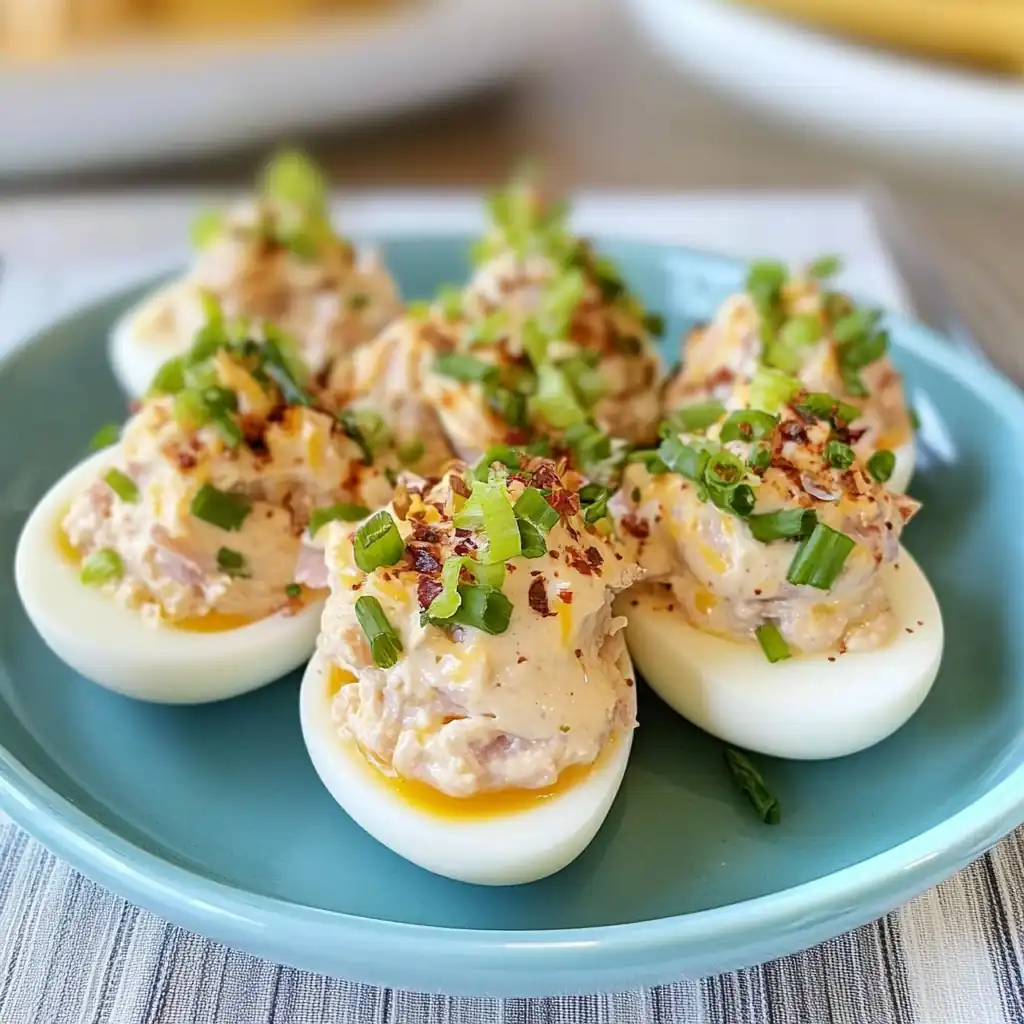
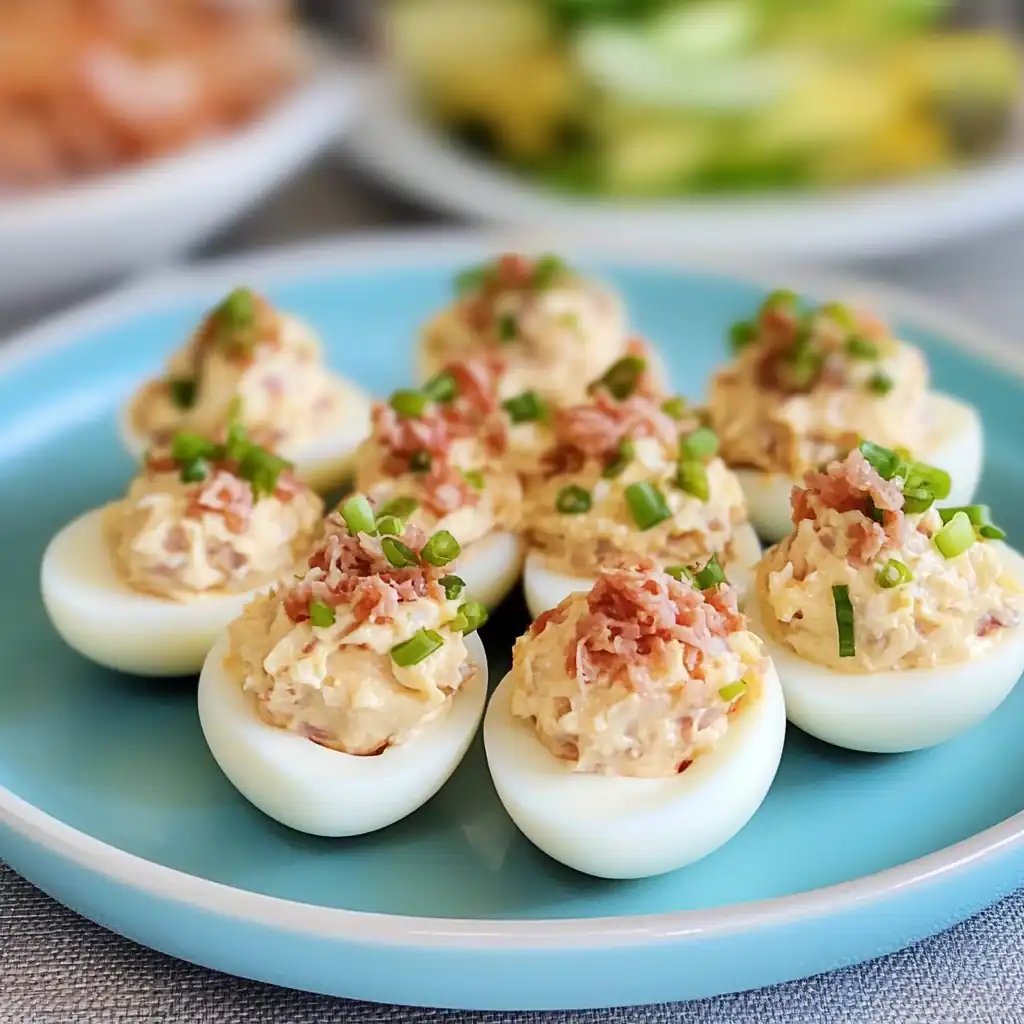
Hard‑boiled eggs deliver a buttery shell that stays intact and a creamy yolk; use 6 large eggs, halved cleanly before filling.
Canned tuna offers a clean, briny note; choose a 5‑oz can in water for a lighter texture and use one whole can, drained.
Dijon mustard injects a sharp, citrusy bite; add one tablespoon for pungent depth.
Apple cider vinegar brightens the mixture and controls oiliness; mix in one tablespoon for sheen and color.
Salt balances flavor; start with one teaspoon and adjust to taste after blending.
Black pepper adds subtle heat; toss in a half teaspoon for a gentle kick.
Paprika supplies smoky pop; stir in a pinch and sprinkle on top for contrast.
 Let’s Make it Together |
- Place eggs in a saucepan, cover with cold water, bring to a rolling boil; lower heat, simmer for ten minutes. Post‑boil plunge them into ice water for five minutes to halt cooking and keep whites firm.
- After cooling, peel each egg and cut in half lengthwise; scoop yolks into a bowl, reserving the whites for filling.
- Add tuna and mustard; mash until creamy; stir in vinegar, salt, pepper, and paprika until integrated; have you tried adding smoky paprika? It boosts depth.
- Transfer yolk paste back into the egg cavities with a melon baller or spoon; fill to the top to prevent leaks.
- Slice the returned tops and spread a thin layer of the mixture; sprinkle paprika for color—does the fresh tuna add a sea‑salt kick that deepens the flavor?
- Chill the deviled eggs in the fridge for at least twenty minutes; this allows the flavors to settle before serving.
Peel eggs immediately after boiling; residual heat softens the shell membrane, preventing cracks during filling.
Use room‑temperature tuna so the mixture stays silky; cold tuna tends to clump, hindering a smooth texture.
Adding a splash of apple cider vinegar before blending tames the tuna’s oiliness and preserves yolk color.
Slice the egg tops in one smooth motion, then spread a thin layer of the filling; it stops the yolk from seeping out.
Store deviled eggs in an airtight container; avoid standing water to keep the filling fresh and crisp for up to three days.
Perfecting the Cooking Process |
The ten‑minute boil keeps the yolk set enough for a pleasant bite yet short enough to prevent a grainy texture. The subsequent cold plunge dialogues with the egg whites, ensuring the whites stay plump and the shells don’t split.
During filling, keep the mixture at or below room temperature; this controls capillary action that burps excess fat and yields a silky, cohesive filling. When plated, a gentle tap on the side ensures the yolk sits flush, giving each bite a uniform experience.
Add Your Touch |
For a smoky depth, swirl in a teaspoon of smoked paprika or a dash of chipotle powder just before filling; the peppery hit adds complexity. Alternatively, top the finished eggs with a sprinkle of chopped fresh dill or pretzel‑crusted croutons for crunch.
If you prefer a dairy‑free version, replace Greek yogurt with silken tofu or avocado mash; the neutral flavor will let tuna’s briny note shine. For diners who like a kick, finish with a dash of sriracha; small amounts amplify heat without overpowering the surface.
Storing & Reheating |
Place finished eggs in a non‑permeable container and keep refrigerated; the strong yolk helps them resist spoilage. Use a paper towel to blot excess moisture before sealing to keep the filling firm.
Reheat egg in foil and warming thirty‑forty five seconds in a microwave, or let them sit at room temperature for ten minutes; do not steam or boil, as the yolk will break and lose texture.
1Piercing the yolk cavity with a needle or skewer traps air and keeps the filling from spilling when carried.
2Stir a pinch of sushi‑grade sea salt into the tuna; the mineral bite elevates the savory profile.
3A melon baller guarantees perfect, evenly sized yolk scoops and a polished look.
4Fill in a calm environment; drafts can scatter salt and give uneven seasoning.
5Serve the eggs straight from the fridge; delayed eatiness diminishes the crisp bite.
FAQ |

Irresistible Tuna Deviled Eggs: A Flavorful Delight – Bold, Tangy, Perfect for Every Gathering
- Total Time: 20 minutes
- Yield: 12 eggs (4 servings) 1x
Description
These Tuna Deviled Eggs combine creamy yolk, briny tuna, and a splash of mustard for a protein‑dense bite. Prep takes just 15 minutes, and the result is a crowd‑pleasing appetizer that’s both flavorful and budget‑friendly.
Ingredients
- 6 large eggs
- 1 (5 oz) can tuna in water
- 1 tablespoon Dijon mustard
- 1 tablespoon apple cider vinegar
- 1 teaspoon salt
- 1/2 teaspoon black pepper
- 1/2 teaspoon paprika
Instructions
- Place eggs in a pot, cover with cold water, bring to a boil, and simmer for ten minutes.
- Immediately plunge eggs into ice water to stop cooking and keep whites firm.
- Peel, halve, and scoop yolks into a bowl.
- Add tuna, mustard, vinegar, salt, pepper, and paprika, then mash until creamy.
- Fill the egg whites with the mixture and top with a sprinkle of paprika.
- Refrigerate for 20 minutes before serving.
- Prep Time: 15 minutes
- Cook Time: 5 minutes
- Category: Appetizer
- Method: Mixing
- Cuisine: American